Hello and welcome to the blog
This is where I respond to the most common questions that clients, family and friends ask me about skiing.
If you have any questions about SkiCoachingOnline, or the ski world. Please do not hesitate to send me an email.
Thank you, and I look forward to hearing from you.
Steve


Mastering Parallel Skiing: Fore and aft tips for Greater Control on the Slopes
Welcome back,
This is Steve from SkiCoachingOnline and in this blog post, we're diving into a valuable tip to help you gain better control over your skis while skiing parallel. Whether you're a seasoned pro or a newbie on the slopes, this technique can significantly enhance your skiing experience. So, let's get started!
1. Light Up Your Skis:
Imagine your skis can light up, with the front and back lighting up at different moments. This visual cue will help you maintain control throughout your turns. Here's how it works:
- For the first part of the turn, focus on lighting up the front of your skis.
- As you progress into the second part of the turn, aim to light up the back of your skis.
2. The Sensation of Control:
As you execute this technique, you'll notice a distinct sensation while navigating the slopes:
- In the initial part of the turn, you should feel a slight rocking movement towards the front of your skis. This ensures stability as you initiate the turn.
- Towards the end of the turn, you'll want to sense the weight shifting toward the back of your skis, feeling my heels helps with this sensation. This shift provides additional grip, especially when you need it most.
3. Improved Control Means a Better Skiing Experience:
By consciously focusing on different parts of your skis during the turn, you gain greater control. This control enables you to adapt to changing terrains and conditions while skiing, enhancing your overall skiing experience. Here's a quick recap:
- Focus on the front of your skis in the initial part of the turn.
- Shift your attention towards the tail of the skis in the latter part of the turn.
This technique ensures you're using the right part of your ski at the right time in your turns, giving you more confidence and control.
4. Try It Out:
Now that you're armed with this skiing secret, it's time to put it to the test. The next time you hit the slopes, make a conscious effort to implement this method. Experiment with the timing and feel the difference in your skiing performance.
5. Share Your Experience:
We'd love to hear about your progress! Drop me a comment or send me a message sharing your experience with this technique. Did it improve your parallel skiing? We can't wait to hear your thoughts.
Conclusion:
Enhancing your parallel skiing skills is an ongoing journey, and it's tips like this that can make a significant difference. Remember to light up the front and back of your skis at the right moments in your turns, and you'll find yourself in greater control on the slopes. So, give it a try on your next ski adventure, and I'll catch you in the next post!
Happy skiing!
Skiing Tips for Beginners: Staying Balanced All the Way Around the Corner
Welcome to SkiCoachingOnline, I’m Steve, and in this guide, we’ll explore a simple yet effective tip to help you maintain balance while skiing in parallel. Let’s dive in!
Breaking It Down
Skiing is all about balance, and one way to achieve it is by breaking your turns into two parts. Imagine the turn as having a first half and a second half.
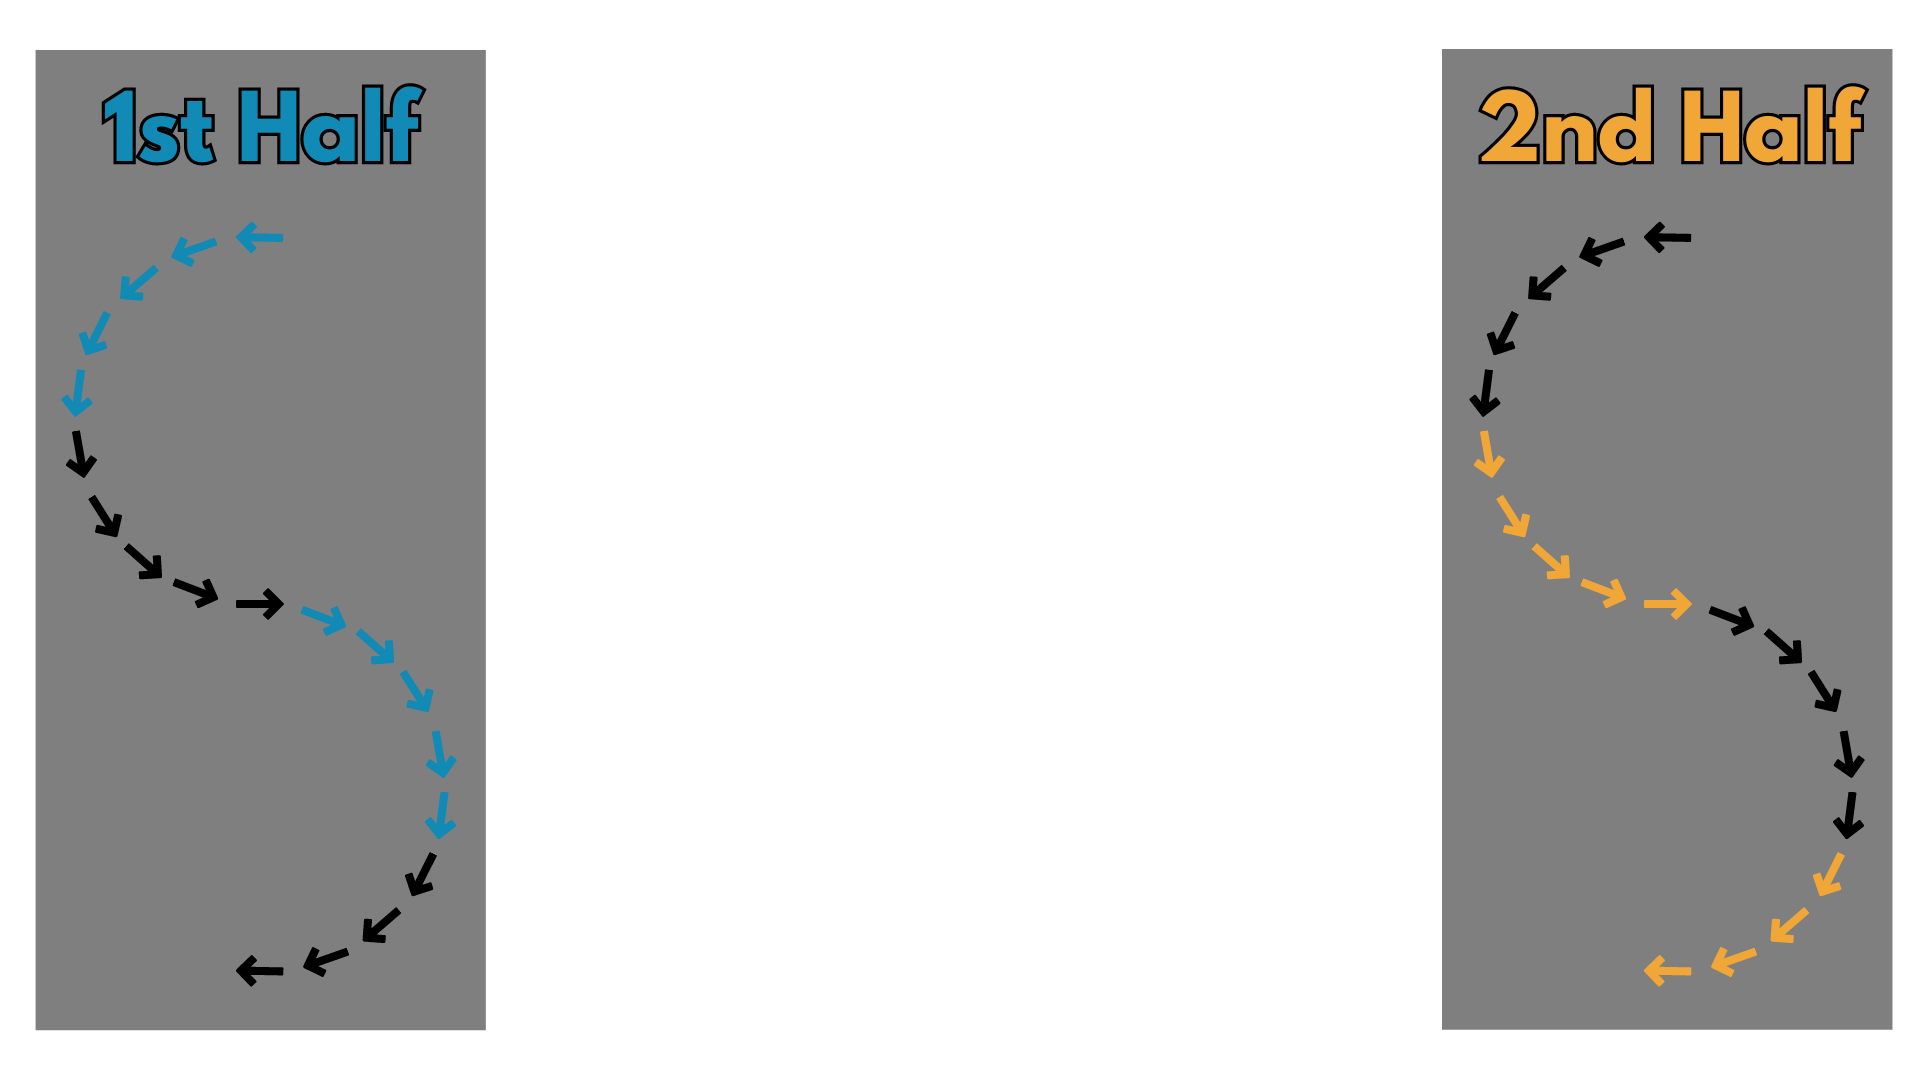
First Half of the Turn
In the initial part of the corner, focus on your outside leg. For instance, if you’re making a left turn, pay attention to your left leg. During this phase, gradually extend your outside leg. As it gets longer, you’ll feel the weight under your outside foot increasing. This added weight makes it easier to maintain balance.

Second Half of the Turn
Now, as you transition into the second half of the turn, shift your focus to your inside leg. In our example, this would be your right leg. Here’s where you should flex or slightly bend your inside leg. By doing this, you ensure that the outside foot stays heavy throughout the bottom part of the corner.

The Challenge: Staying Balanced
Balancing through the entirety of the turn can be quite challenging, especially for beginners. This technique aims to address this issue.
By extending the outside leg in the first part and flexing the inside leg in the second part, you’ll notice improved balance and control throughout the entire turn.
Try It Out!
The next time you hit the slopes, give this technique a try. Experiment with extending and flexing your legs as you tackle each turn. See how it impacts your balance and control. Feel free to share your experiences and results with us!
Conclusion
In summary, mastering the art of skiing involves understanding the importance of balance. By splitting your turns into two parts – extending the outside leg in the first half and flexing the inside leg in the second half – you can significantly enhance your control and balance around the corners.
So, give it a try, and remember to let us know how it works for you. We look forward to your feedback. Until next time, stay safe on the slopes and enjoy your skiing adventures!
What is a good workout routine for skiing?
How do I get fit ready for skiing?
What exercise do I need to do before a ski trip?
What fitness do you do, so you can ski all season?
Am I fit enough to enjoy a ski holiday?
These are questions which I get asked all the time by clients, friends and family being a ski instructor, skiing all year round.
I will list a few routines/exercises that I do, to allow me to ski year round.
As a caveat here, I am not a licenced fitness instructor. But over the years these are the routines that I have found to be successful in keeping me injury free, and able to ski year round.
Stretching/Warm up
In the morning, I will warm up my muscles ready for the day of skiing ahead. In the evening, I will stretch out the muscles as a cool down after the ski day. It may sound like a lot, but once you get used to it, it’ll only take around 10-15 minutes each.
Morning warm up
Away from the ski world I stretched my ACL, and through the physiotherapy to get back to full strength I worked with a specialist, and she recommended a couple of exercises that I still do today as a warm up before skiing. To fire up the correct muscles to keep my legs healthy.
Balance
I will balance on one leg for a minute with a slight bend at the knee. Repeating on the other leg. Doing this a total of 3/4 times on each leg.
To make this easier, you can decrease the time spent balancing on one leg, and over time with consistency it will improve up to balancing for 1 minute on each leg.
To increase the difficulty, keep your eyes closed. Or stand on a wobble board/half a gym ball. These can be found in gyms, or purchased online.
Movement
15 squats x 2/3
With both of my feet flat on the floor, with my toes facing forward as much as comfortable. I Squat down through slow controlled movement as if I am going to sit down on a chair. I will hold for a split second in the bottom position, where my thighs are parallel to the floor, my knees will be roughly a 90 degree angle. Then stand back up straight, pushing through my heels to straighten the legs.
I do fifteen squats, not rushed, just simply warming the legs up. And repeat this three or four times. Warming the front and back of the legs up.
Crab walks 15 x 2/3
This one warms up my butt and the muscles used to keep my knees safe whilst skiing.
Similar to the squat, I will stand with both feet on the floor, and lower my butt to roughly a 90 bend in the knee, with my thighs parallel to the floor.
Once in this position, I will take sideways steps, depending on where I do this, if there is space I will take 15 steps in a row. If not, I use whatever space I have, and eventually get up to fifteen steps.
I repeat this two or three times. This for me, really gets my leg muscles fired up.
To make this easier, decrease the amount of bend in the legs, whilst stepping sideways.
To make this more difficult, use a band around your legs to increase the effort needed to step the legs apart whilst moving sideways. Again most gyms have these, or they can be purchased online.
“Use code ‘BLOG20’ for 20% off the eBook below”

Stretching
Quad Stretch
This stretches the front part of the leg above the knee.
I bend one leg with the knee on the floor close to the wall, and the top of the foot flat against the wall. My other leg is bent in front of the body with my foot flat on the floor.
I feel the stretch in the leg with the knee on the floor. Moving the knee that is on the floor closer to the wall increases the stretch.
I do this stretch for two minutes each leg.
To make this stretch easier, move the knee that is on the floor further away from the wall to decrease the bend in that knee. To make this stretch harder, move the knee that is on the floor closer to the wall to increase the bend in that knee.
Hamstring Stretch
This stretches the back part of the leg above the knee.
I sit on the floor, on my butt with my legs together and straight out in front of me.
With my toes pointing at the sky, I reach forward and grab my feet.
Feeling the stretch in the back part of my legs. I do this stretch for 3-4 minutes.
To make this stretch harder, reach further forwards, to make this stretch easier decrease how far down your leg you reach.
Glute Stretch
This stretches my butt muscles.
I start in a lunge, and then place the front leg flat on the floor, with the inside of my leg and foot facing upwards.
I feel the stretch in the side of my butt of whichever leg is in font.
I do this stretch for 2 minutes on each leg.
To make this stretch harder try to keep your hips as close to the floor as possible. To make this stretch easier elevate your font leg onto a box or something similar.
A stretching App
I do the stretches above daily to help keep my legs strong and supple.
However, I do others too after a workout. I use an app called GOWOD, this is a great app that gives you set stretches to perform, which the app measures. And then tailors stretches to work on your weaknesses.
Workout for Skiing/Snowboarding
There are a tonne of great workouts to do for skiing or snowboarding to make sure that you are fit for your holiday.
A great one is listed below. And it is one that Katie Ormerod (World Class Snowboard Athlete) uses, that can be done at home. There is a video below to watch her perform the exercises.
Each exercise is performed 10 times, and repeated 3 times. Therefore each exercise is performed 30 times in total.
Hip Flexor Mobility
Squatting down, and whilst in the bottom of the squat reach one hand above your head, and then the other. Stand back up straight, and this is one full repetition.
in out crunches
Start with your butt on the floor, legs and arms long and raised off the floor. Then bend your legs and bring your knees to your chest, whilst reaching towards your feet with your hands. Then stretch the legs and arms back out straight. This is one repetition.
Russian Twists
Sitting on your butt, with your shoulders and legs off the floor. Twist your upper body, and lightly touch the floor to the side of you with your hands. Then return to the center. This is one repetition.
Single leg hip thrusts
Laying on your back with you knees bent at around 90 degrees. Using one leg, raise your hips off the floor, allowing the other leg to raise off the floor too. Then lower the hips and leg, back to the ground. This is one repetition.
Tuck Jumps
Start standing up, squat down, then jump up into the air, whilst in the air bring your knees up to your chest making a ball. Stretch your legs back out, and land gently on the floor. This is one repetition.
Finished
This is great little workout that can be performed almost anywhere, as you do not need any specialist equipment.
Thank you
Thank you for reading this blog, this is way that I like to stretch and get ready for skiing, there are many others.
Feel free to share this with anyone who you think may be interested, using the sharing links below.
Thank you for reading.
Steve
If you need any more information on anything written here or have any suggestions for more blogs that you would like to read. Please don’t hesitate to let me know below. Thank you.
What is your favourite snow to ski?
I often get asked a question similar to this by clients, friends and family.
What is your favourite type of snow to ski?
Do you have a preference for different types of snow?
Do you prefer slush or ice?
This blog will outline some of the pros and cons of the different types of snow that you may encounter whilst skiing/snowboarding around the mountain.
These pros and cons are formed from information I have gathered from being a ski instructor/coach for over a decade, from my own, and my guests experiences of the different types of snow and the areas that they are found.
This is by no means an extensive list of the pros and cons, but simply a quick guide for those looking to understand a bit more about the different types of snow you may experience on a ski trip.
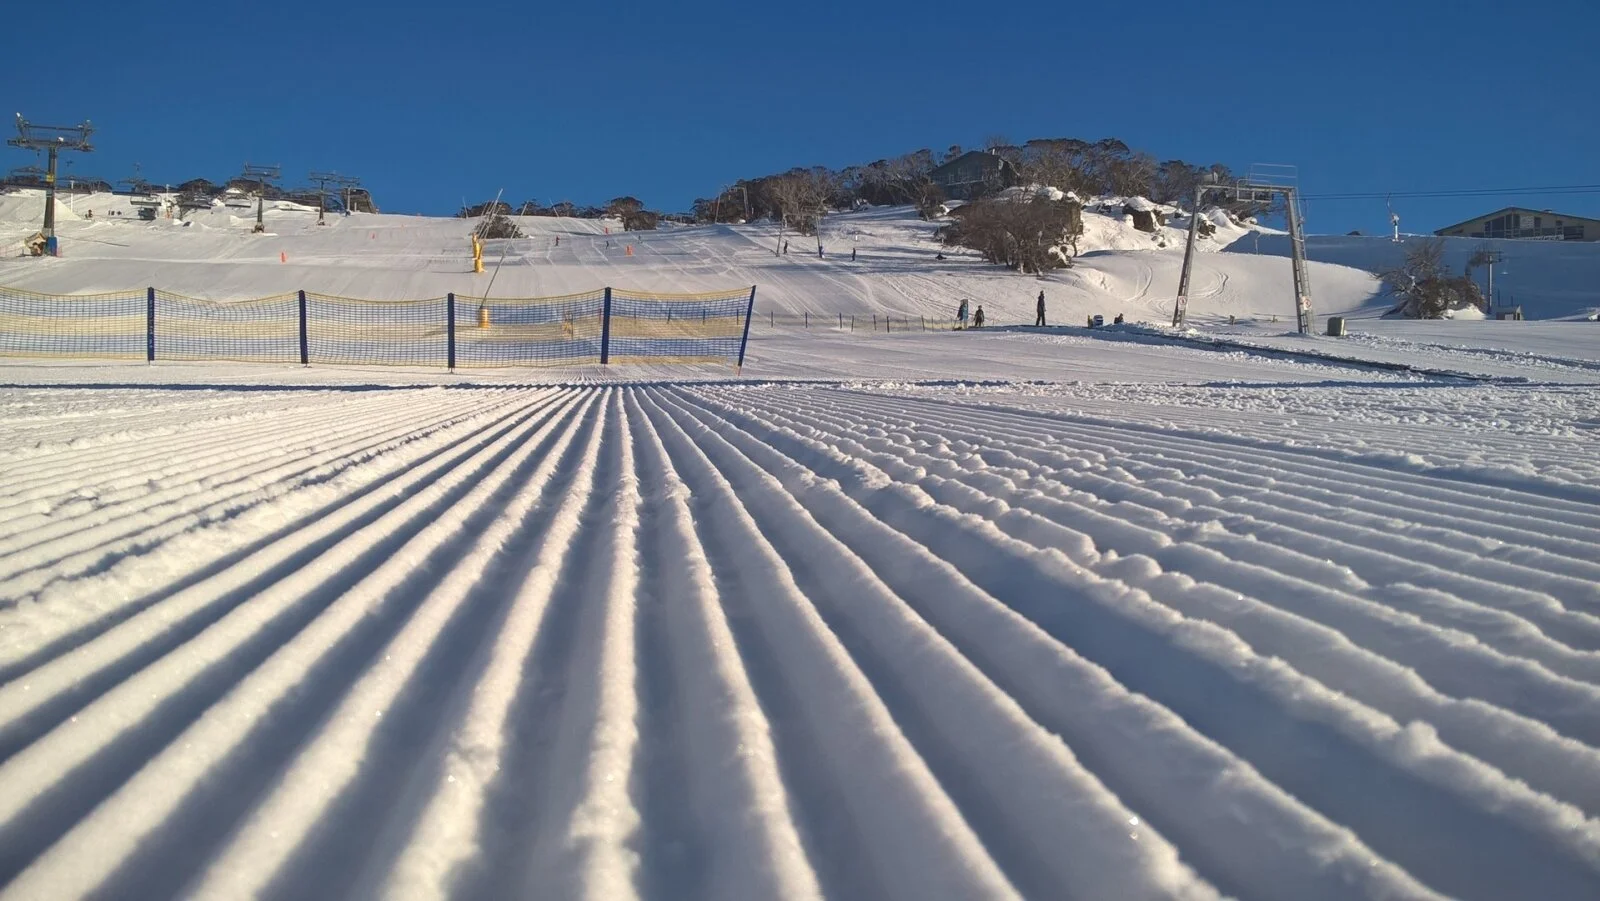
Groomer/Piste
These names are often used to describe the snow which has been artificially flattened using a machine. These machines are referred to as ‘Piste Bashers’ and essentially comb the snow flat, removing any bumps or ski tracks that were left after the previous days skiing.
Pros
Smooth terrain
Clients like that the snow is consistent, and that there are no hidden lumps or bumps to catch them out.
A path to follow
Groomed trails, are on a map, and will lead somewhere. Clients enjoy the ability to switch off and simply follow the trail down the mountain.
cons
Busy
The friendly no hidden bumps and lumps of the groomed snow attracts people meaning this is where most people will spend their time whilst skiing. In the busy resorts and around peak times such as just before lunch time and at the end of the day, this can lead to heavy traffic on certain runs.
Simple
The smooth clean lines of a groomed run can be unattractive to some people that wish to pound moguls all day long.
Ice
Ice can be found all over the mountain from a groomed piste, to the backcountry and even in the moguls.
Ice can form in a number of ways, weather, skiers, injected. I’ll go more into this in other blogs.
pros
Racing
Alpine ski races use ice as it gives a consistent surface for the athletes to race on. Ice is more stable and predictable than soft snow, creating a safer environment for the athletes competing.
speed
Some clients and fellow instructors prefer the firmer icy snow, as it provides less resistance on the skis and they can reach higher speeds than when they ski powder they say.
cons
less grip
Clients often have a fear of ice due to past experiences of slipping out and or losing control whilst skiing on ice. This can be mitigated by slowing down movements, and making sure that you are balanced correctly over the skis.
Not a soft landing
This goes hand in hand with the above point. Falling on ice hurts, therefore creating a fear of the ice which in turn can mean more falls on the ice, due to panicking when feeling ice underneath the skis.
“Use code ‘BLOG20’ for 20% off the eBook below”
powder
This is some peoples holy grail and why they book the ski holiday in the first place. After watching a ski advertisement of someone floating through waist deep powder with the snow trailing behind them like a cloud in the sky.
Powder snow, refers to fresh snow that has fallen from the sky and landed on the floor. Instead of skiing on top of the snow like with ice the skier skis through the powder snow, sometimes without being able to see the skis.
pros
ski movie
Skiing bottomless powder in Japan reaching the bottom of the run looking back at my friends skiing down, felt as if I was watching a ski movie. One of the best moments I have ever had on skis.
floating
Floating, flying, cruising, drifting all these words have been used by clients after their first experience of skiing powder snow. Skiing powder is a hard feeling to describe, but once you have felt it, its even harder to forget.
cons
hard to ski
Often clients ask for a lesson on how to ski powder snow. As skiing through the snow as opposed to on top of it adds another dimension which is sometimes difficult to get hold of.
Crud
This refers to everything that isn’t listed above, such as slushy snow or chopped up powder snow and everything in between.

pros
spring slush
Springtime brings the sunshine which in turn melts the snow. At certain times of the day the snow is a perfect mix of strong enough to hold, but soft enough to drift. With this being some peoples favourite type of snow to ski.
empty
Not many people will choose to ski chopped up powder or anything that isn’t fresh snow or a groomed run. Therefore meaning more space and quieter runs to enjoy.
cons
inconsistent
Crud snow is inconsistent, whether it is powder snow that people have skied, or melting spring snow this doesn’t make for the smoothest of rides for the skis.
I know it seems cheesy but personally I really do not mind any type of snow. As there is always something fun to do on it. With that said though, some of my best memories I have had skiing with clients and friends have been skiing bumps on slushy spring days and skiing on deep powder days.
Again, this is not an extensive list of all the snow conditions, but just a couple of pros and cons of the most likely snow types found whilst skiing.
Feel free to share this with anyone who you think may be interested, using the sharing links below.
Thank you for reading.
Steve
If you need any more information on anything written here or have any suggestions for more blogs that you would like to read. Please don’t hesitate to let me know below. Thank you.
Should I book a private or group lesson?
I often get asked a question similar to this by clients, friends and family.
Which is the best type of lesson for me?
Is one type of lesson better than the others?
Do I get more out of a group lesson or a private lesson?
There are a few things to keep in mind such as price, how many people it’s for, and the time, both of the day and the season.
This blog will outline some of the ski school products available, to give more clarity on what they are, hopefully making the choosing one a bit easier.
Each ski school will have their own specialised products, either check their website or give them a call to get a run down of what is available, and at what price.
However more often that not it’ll be one of these options.
Group Lessons
Private lessons
Below is a breakdown of these types of lessons.
“Use code ‘BLOG20’ for 20% off the eBook below”
Group Lessons
What are they?
A group lesson consists of a mix of people who normally do not know each other, who ski at a similar ability.
Who are they for?
Most ski schools will run lessons for both children and adults. With some running teen, or age specific classes as well. Depending on the size of the school, demand etc.
Pros
Price
Group lessons tend to be cheaper than other types. More people in the lesson, allows the price per individual to drop. Making it a cheaper rate for the people attending.
New friends
It often happens as an instructor that you ski with a group just for the morning. With members of the group then choosing to ski with each other in the afternoon. This happens often because many people feel more comfortable skiing with people at a similar level to themselves.
For example, I have worked with a family, who choose to put their children in group lessons to develop their social skills as they develop.
As well as clients, who prefer to ski with their group in the afternoon, than their spouse, as they prefer skiing with someone of a similar ability.
Cons
Less face time with the instructor
Being in a group, will split the instructors time. Meaning less of a one on one feel. A good instructor will be able to manage this with no issue and it should not be a concern.
However, with any group, there will be a mix of people. Some wanting to just ski, some wanting to get deep into the intricacies of the technique. This can be negative if you’re doing more of what you do not like.
Fix meeting points
Due to many random people coming together for the group. A fixed meeting point is necessary to keep everyone together.
Same as the drop off point. Adults can be a bit more flexible as they can either drop off early, or can be left on the mountain at the end of the lesson.
However more often than not, and especially with children, a designated drop off and pick up point is fixed.
This can limit how much of the mountain you see, if you have to start and stop at the same place everyday.
Availability
Depending on the size of the school, there may not be a group lesson for your ability running at that time.
Private Lessons
What are they?
A private lesson is a lesson where you decide who is in the lesson, and what the goal is. As well as depending on the school, where to meet, where to finish, and how long for.
Who are they for?
Anyone. You can have almost any age, with any ability for a private lesson.
Pros
Pace
The lesson is geared to your pace of learning.
Focus
The instructor is solely focused on you, and helping you achieve your goals.
Start & end points
Depending on the resort, private lessons can start wherever you choose. From being picked up at your hotel or chalet. Or even meeting the instructor at the top of the mountain.
The same for the when the lesson ends. You can tell the instructor to drop you off somewhere, or just finish wherever you like.
Who
You can put whoever you want in the lesson.
You can split your family or friends so that they each have a bit of individual time with the instructor throughout the day.
Or you can have everyone together at the same time.
Cons
Price
Due having one instructor to yourself, the price is often more expensive than a group lesson.
Just you
There is no group dynamic, or meeting of new people.

How long are the lessons?
At most ski schools you can book a private or group lesson for different times of the day.
It is worth checking out the resort you are at and the way that the ski school price their lessons, as often the time of day/season can alter the price.
For example, schools I have worked at offer a cheaper early bird price for private lessons starting at 8:30. Where as others have offered cheaper private lessons in the afternoon.
Lessons take place in the:
Mornings
Lessons can be booked for the mornings, which often run from 09:00 to 12:00. These are popular because they allow for tuition in the morning with free time in the afternoon.
Often the slopes are quieter in the morning as well, which is a plus of starting the lessons earlier in the day.
Afternoons
Meeting after lunchtime, often they start at 13:00 and finish at 16:00. These are popular with those who prefer a relaxed morning, not rushing to get the first lifts.
Or people that wish to explore themselves in the morning, and pick up a few tips in the afternoon.
Full Days
The products can differ slightly but more often that not they start at 09:00 and end at 4:00.
This is popular with those that wish to benefit from tuition all day, or wish to be guided throughout the day, without the constraint of time.
Hourly
Some schools, offer the lessons by hour. Starting from 1 hour up to 6 hour full days.

Other products
Each ski school will have their own specialised products, such as:
Woman only camps
freestyle camps
Big mountain skiing
Therefore checking out their website or giving them a call is helpful to get a run down of what is available, and at what price.
This is by no means an extensive look at the each of a ski school products. However hopefully it has shed some light, as it outlines the common things you’ll find around the world when it comes to booking ski school lessons.
Feel free to share this with anyone who you think may be interested, using the sharing links below.
Thank you for reading.
Steve
If you need any more information on anything written here or have any suggestions for more blogs that you would like to read. Please don’t hesitate to let me know below. Thank you.
What items do I need to carry whilst skiing?
Picture this, seconds before the first run of the day, sun rays glistening off the freshly groomed slopes, crisp air. Everyone giddy with excitement all together ready for the first day of the holiday. Then it hits… your ski gloves are back at home on the table. Morning, sometimes even the day ruined.
It is very frustrating and has happened to most of us, whether it is gloves, goggles, sun cream, wallet etc. Forgetting an item can ruin the day. Below is a list that I run through to make sure that I have everything I need to enjoy a day on the hill whilst instructing.
This list is of the items either with, or on me every day whilst working as a ski instructor. With a brief summary of how they can be useful on a ski day.
Clothes
Underwear
Comfort is key, skiing is a sport which requires movement. Wearing something that is comfortable and can be worn for a full day.
Thermal Underwear
This includes bottom and top. Thermal leggings, sometimes referred to as long johns. As well as a thermal top, or vest. With both, beware of thick elasticated ends to the arms and legs, and with other equipment on top, such as gloves, and ski boots. These can become extremely uncomfortable.
Ski Socks
I live and work in Zermatt, Switzerland where often it can reach -20 degrees and below on the glacier. As a result, many instructor friends of mine and guests wear heated ski socks. These are not a must. But something to consider if cold feet is a day ender for you.
T-Shirt
As mentioned above it can be cold where I am based, therefore a t-shirt on top of the thermal top for me is a must.
Mid-Layer
This could be a fleece top, or a puffer top. Anything that can fit comfortably beneath a jacket. When it comes to warmth, layering is key. It is warmer to have a few thin layers (thermal top, t-shirt, mid-layer, shell jacket). Than one large thick jacket.
Jacket
My uniform jackets have more often than not been shell jackets, meaning that they are water proof, however they are extremely thin. This is fine when worn with the appropriate layers beneath. For me, a thermal, t-shirt and mid-layer with the shell on top is great for most weathers, as it is easy to remove one of the layers if needed. Also most shell jackets have ventilation zippers underneath the armpits, ideal for warmer spring days.
Ski Pants
Like the Jacket, you can either get thick or thin ski pants. With thin ski pants, thermal bottoms, and potentially thermal shorts may be needed as well, if heading out on the -20 days.
Gloves
Ski gloves are a must, for warmth and safety. Skis are sharp and a ski glove can protect from injury as well as keeping the hands warm throughout the day.
Inner gloves
Some people are not fans of inner gloves, and do not wear them. However, others feel that these are essential on the extremely cold days. Also in a pinch, inner gloves can be worn if big gloves are misplaced. They are light and can easily be thrown in a spare pocket with minimal hassle. Could be a day saver.
“Use code ‘BLOG20’ for 20% off the eBook below”
Equipment
Goggles
Goggles, an essential bit of kit, which can be worn with a helmet or ski hat. Goggles perform well in all weathers, they protect the eyes from sun, wind, and snow. Over the last few years a lot of new technology has been put into the lenses of goggles, to be able to perform in different types of light. However, it is most common to find either a lens that is more suited for an overcast day, or a sunny day.
Ski Boots
Dry, ski boots are a must. Wet boots can easily be a day ender.
Sunglasses
It is worth having sunglasses in a pocket, for either a sunny lunch spot or apres. Putting them in a secure case is recommended, as a fall could easily snap a pair of sunglasses.
Helmet/Headwear
Helmets deliver more protection and are more waterproof than most ski hats. For children, in most ski schools helmets are a requirement, and the child will not be able to attend if they do not have one.
Skis and Poles
It is worth asking at reception of the hotel or check online if there are lockers on the mountain, or at the bottom of the lift, to allow for a ski free walk to the lift. Not having to walk the skis and poles back to the hotel every night can make a big difference to the end of the ski day.
Watch
I always wear a watch, handy to know whether you can sneak another run in or whether the lift is about to close.

Other
Sun cream
Essential, for skin protection both from the sun and the harsh weather that skiing can bring, cold dry weather can harm the skin if not protected. Often better to buy in town, as it can be expensive to purchase on the mountain.
Lip Balm
Worth having a lip balm with sun protection, to stop lips from cracking and getting sun burnt.
Wallet
Essential to have some money, both the local currency and a card as many mountain restaurants/huts/shops do not accept card payment. ID card, and insurance card in case of an accident. Some people keep an I.C.E card too with an emergency contact number on, which is short form for ‘In Case of Emergency’.
Phone
A mobile phone, with full battery. A mobile phone can be used for several things. However with cold temperatures it is worth noting that videoing, and some ski tracker apps eat up battery extremely quickly. Keeping in a layer closer to the body, rather than a pocket on the outside of a jacket will keep the phone warmer than if it was on an outside jacket pocket. If the snow is a worry, a zip lock bag can keep the phone dry, and a touch phone can also be used through a zip lock bag.
Piste Map
Keeping a map of the area is a useful tool to keep track of where you are on the hill.
Snack
An energy bar, or snack bar could be a day saver on a cold lift or allow for a few extra runs before lunch.
Water bottle
A camping collapsible bottle or water holder can be very handy.
Headphones
They are useful to have when making or receiving calls on the mountain. Whilst wearing a helmet and gloves. Communication is key as knowing when and where you are meeting family, or other members of the party can create a stress-free day on the hill.
Fanny pack
I personally do not carry daily, but more and more people I work and ski with do. They are an easy way to carry some of the essentials from the list above.
Extra phone battery/Charger
If you have electronics, video camera, go pro, mobile phone etc. It might be worth packing an extra battery, or some form of mobile charging device. As the cold weather can quickly empty a devices battery. I have the Apple iPhone battery case; this gives me another full charge which is plenty to get through even a cold day on the hill.
You can use this list as a quick check in the morning to make sure everything is present for a fun day on the hill. Adjusting the list as necessary for individual needs, such as medical supplies, an inhaler, medicine, EpiPen etc.
Feel free to share this with anyone who you think may be interested, using the sharing links below.
Thank you for reading.
Steve
If you need any more information on anything written here or have any suggestions for more blogs that you would like to read. Please don’t hesitate to let me know below. Thank you.
What are edge rolls? Rollerblade turns?
What are Edge rolls?
What are Rollerblade turns?
What are Cat track turns?
They have multiple names, but this is what they look like.

What are rollerblade turns?
Edge rolls are when the same sides of the skis are touching the snow at the same time.
For example skiing along with both of the right hand side of the skis slicing into the snow.
The track left behind will be two thin lines.
How do I do rollerblade turns?
By tipping the feet over onto the side that you want to slice into the snow.
It helps if you are balanced in the center of your feet, not too far forward or backwards.
This allows for the muscles in the legs to be able to tip the feet and skis onto their sides.
“Use code ‘BLOG20’ for 20% off the eBook below”
Why should I do rollerblade turns?
They are fun.
They are a quicker way of skiing on the cat tracks than sliding around.
They help to practise simultaneous movements of the legs and feet which is a skill utilised in expert skiing.

This is a very brief description of the task, but I hope you take this information and give them a go.
Feel free to share this blog with anyone who you think may be interested, using the sharing links below.
Please let me know how it goes.
Thank you for reading,
Steve
If you need any more information on anything written here or have any suggestions for more blogs that you would like to read. Please don’t hesitate to let me know below. Thank you.
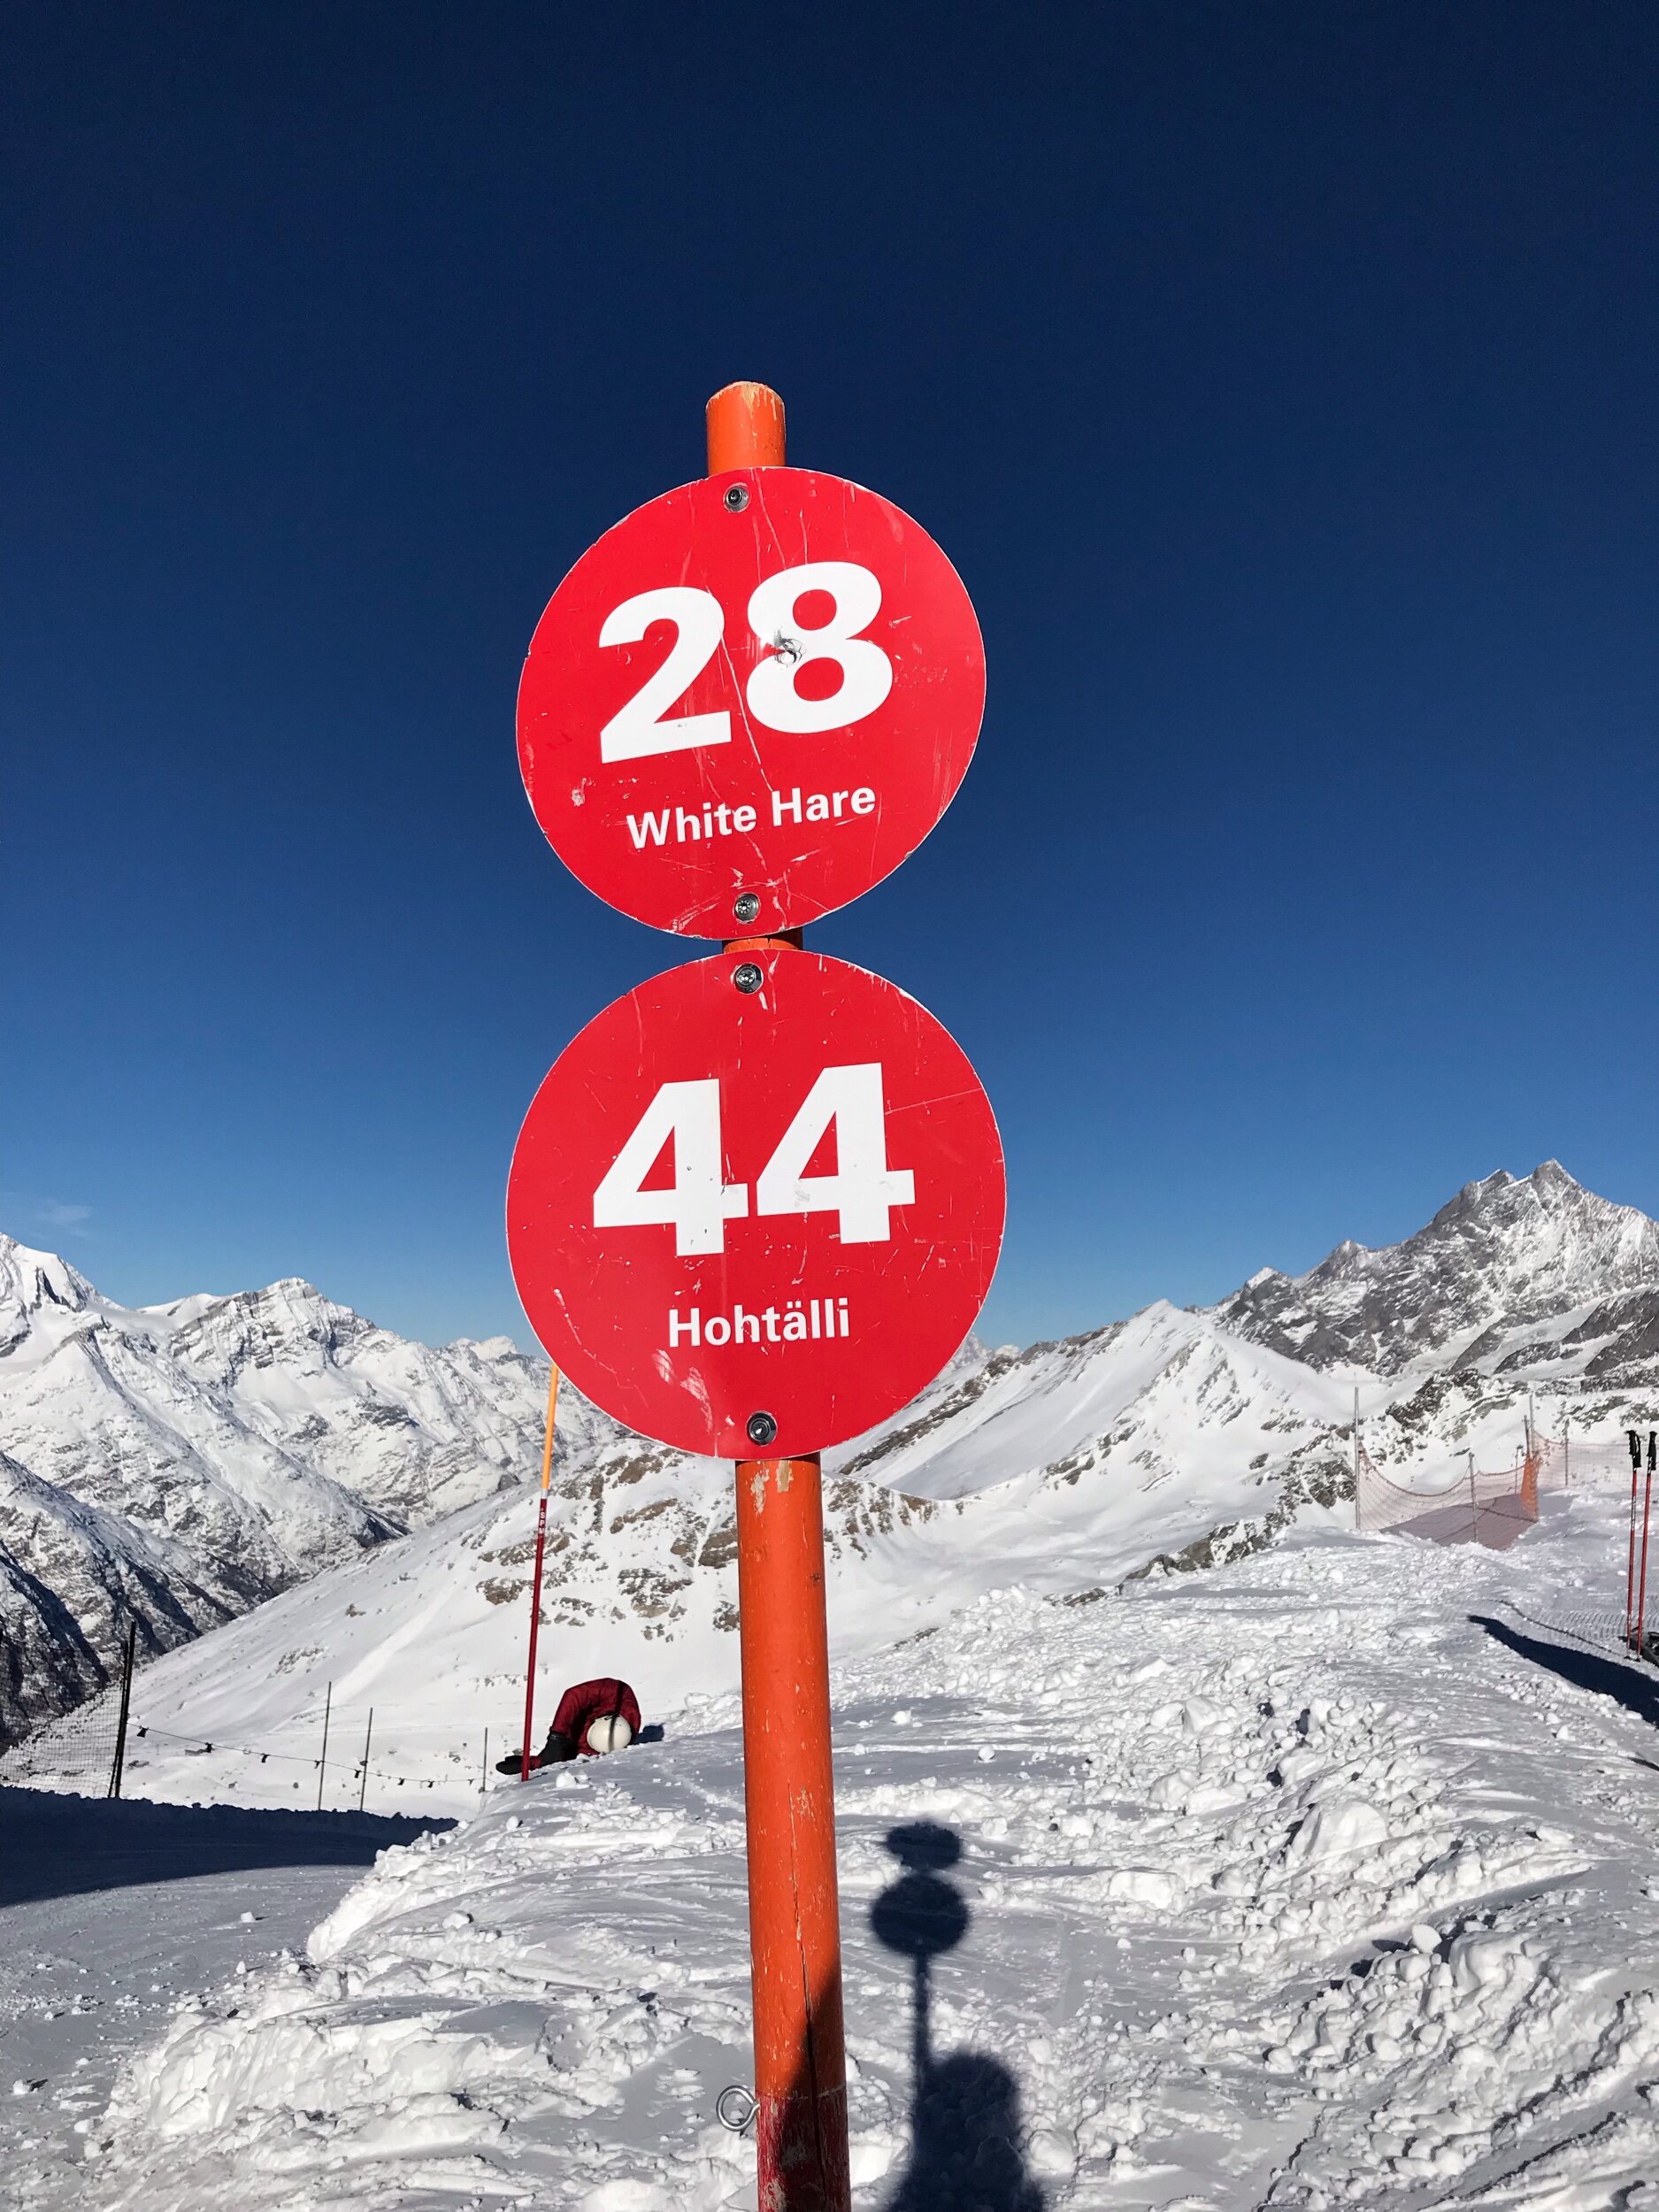
Are ski runs the same at every resort?
In Short no, a red run is not the same difficulty across the world.
In most of North America red runs do not even exist. Find out what they use instead below.
In ski resorts around the world, the resorts piste maps are covered with symbols and colours that highlight many different factors.
Symbols on a piste map can highlight
Pitch
How steep or shallow the run is.
Groomed
Whether the run has been flattened by a groomer overnight.
Glades
A run, or area that is skiable but is covered in trees.
Resort Boundary
Marker to show where the resort area ends.
Lifts
They usually show using different symbols which type of lift it is, t-bar, chairlift, gondola. etc.
Along with restrooms, restaurants, ski patrol, ticket windows, slow zones, freestyle terrain, bus stops, ski school meeting areas, lockers, guest services, scenic viewpoints and many others.
Each ski resort normally has their own key at the bottom of their piste map. It is worth having a check when in resort to become familiar with where and which symbols are used in that resort.

Ski Runs
Depending where you are in the world the colours can mean differnt things. Double check the resort you are at when you grab a piste map, but below is the standard for most resorts in that country. With the ability level on the left, and the colour of the run on the right.
America
Easy - Green
Intermediate - Blue
Advanced - Black
Expert - Double Black
Australia
Easy - Green
Intermediate - Blue
Advanced - Black
Expert - Double Black
“Use code ‘BLOG20’ for 20% off the eBook below”
Austria
Easy - Blue
Intermediate - Red
Advanced - Black
Canada
Easy - Green
Intermediate - Blue
Advanced - Black
Expert - Double Black
China
Easy - Green
Intermediate - Blue
Advanced - Black
France
Very - Easy Green
Easy - Blue
Intermediate - Red
Advance - Black
Japan
Easy - Green
Intermediate - Red
Advanced - Black
Expert - Double Black
New Zealand
Easy - Green
Intermediate - Blue
Advanced - Black
Switzerland
Easy - Blue
Intermediate - Red
Advanced - Black
Safe off Piste - Yellow
I hope this clears up which countries have which slope. This is not every ski country in the world, but the most common ones which I get asked about.
Again make sure to look specifically at the resorts Piste map key, to make sure it aligns with the above. As some resorts in the same countries use different markings.
Feel free to share this with anyone who may think may be interested, using the sharing links below.
Thank you for reading.
Steve
If you need any more information on anything written here or have any suggestions for more blogs that you would like to read. Please don’t hesitate to let me know below. Thank you.
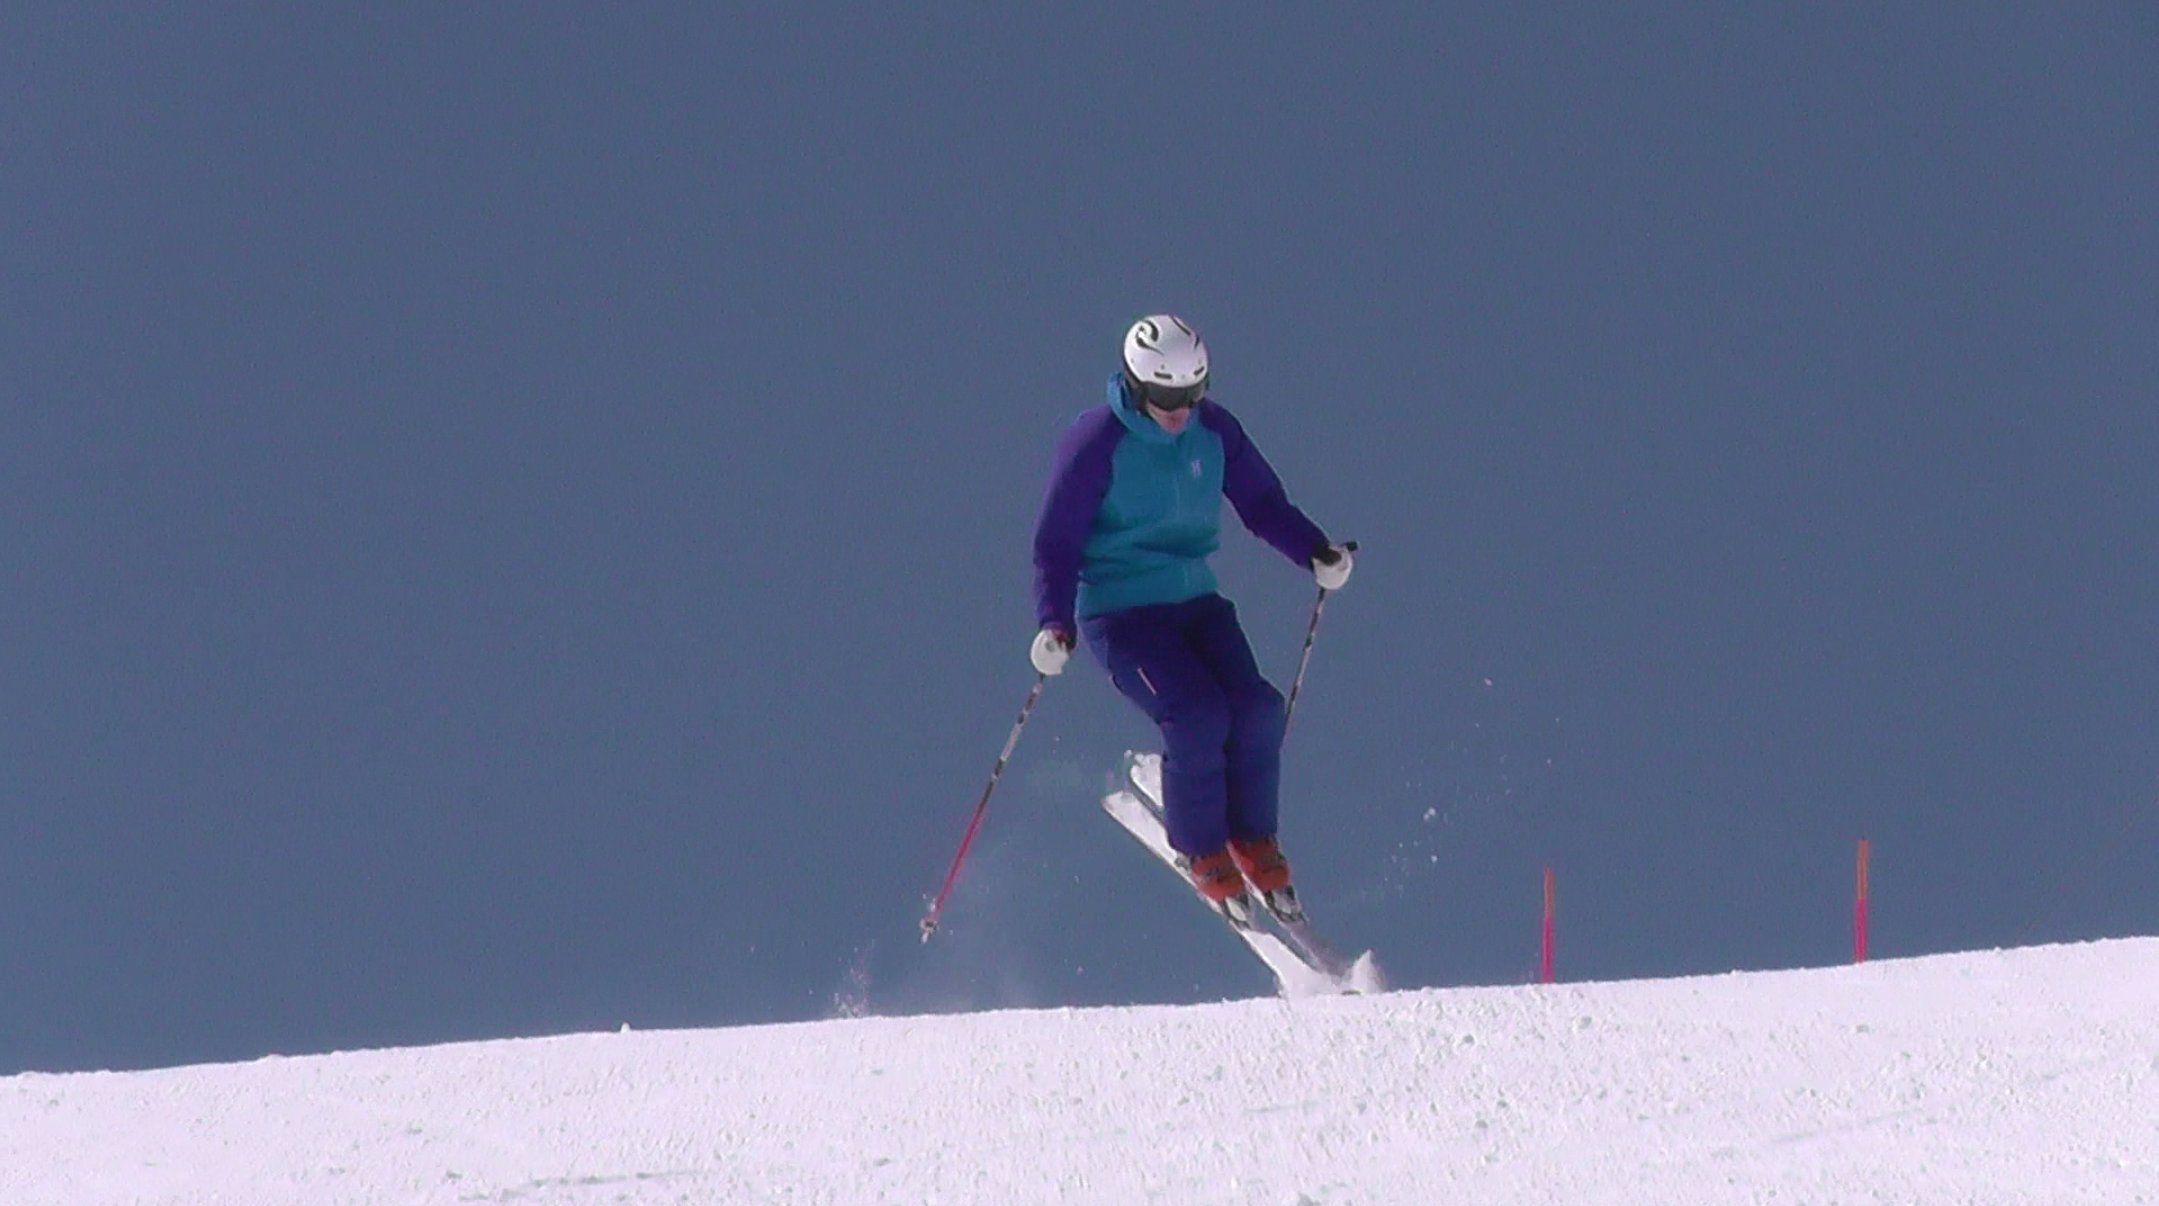
What are Dolphin Turns?

what are dolphin turns?
Dolphin turns are a very fun exercise that can be performed almost anywhere on the mountain in most types of snow.
It is a more advanced task but worth having a stab at if you can ski around with parallel skis, as there is minimal risk of danger.
The task is to make the front of the skis lift off the snow, then the middle, and finally the backs of the skis. Once in the air, it is the tips of the skis that contact the snow first followed by the rest of the ski.
Called dolphin turns, as the movement of the skis is a similar shape that a dolphin makes when jumping out of the water.
I highly recommend doing them on a groomed run that is at a comfortable steepness for the skier when attempting them for the first time.
“Use code ‘BLOG20’ for 20% off the eBook below”
how do I do dolphin turns?
There are a few ways to achieve this task. Depending on the way in which the skier uses their joints; the ankles, knees and hips.
However, the main focus is to shift the weight towards the back of the skis, to lighten the ski tips and get them off the snow. Once in the air, a movement of the weight forward will allow the tips of the skis to touch the snow first.
why should I do dolphin turns?
As mentioned above, use of the ankles, knees and hips working together are essential for success in this task.
Moving these joints together, will allow for greater control of the skis, and the body. Essential for expert skiing.
This drill, is a great way to train the body to work with the skis to get them to leap off the snow.
The mobility skills developed with this task are implemented whilst skiing powder, bumps, carving etc.
This is a very brief description of the task, but I hope you take this information and give them a go.
Feel free to share this blog with anyone who you think may be interested, using the sharing links below.
Please let me know how it goes.
Thank you for reading,
Steve
If you need any more information on anything written here or have any suggestions for more blogs that you would like to read. Please don’t hesitate to let me know below. Thank you.
What is your favourite ski movie?
Do you watch ski movies?
Do you have any favourite ski movies?
These are questions I often get asked by clients, family and friends. This blog is a run down of some of my favourites.
When it comes to ski movies, there are a few that stick out for me.
Claim (2008)
Claim is a feature from Matchstick productions. The link above is a list of their movies on their website.
There are a bunch of movies that could have made this list from Matchstick, some of my favourites from them are, Claim, McConkey, and Superheros of Stoke.
Claim is my favourite because in the movie they make fun of themselves and the ski industry.
Claim makes fun of the too cool for school attitude that appears in the ski industry. That if you have skied something terrifying or difficult, you have to blow it off and make it seem like it was nothing.
That’s where Claim came in, getting everyone back on the side of showing how excited they are about what they just skied.
By getting people to Claim it!
The Blizzard of AAHHH's (1988)
Blizzard of Aahhh’s is a ski movie that showed people what extreme skiing is all about. There are so many things to enjoy about this movie, the skiing, the locations, the music, the outfits, the equipment.
All these elements make for a great look at extreme skiing.
With skiing by the legends of freeskiing Scot Schmidt, Glen Plake and Mike Hattrup. Most pro freeskiers around these days look up to those guys as the Godfathers of the sport.
Definitely worth a watch.
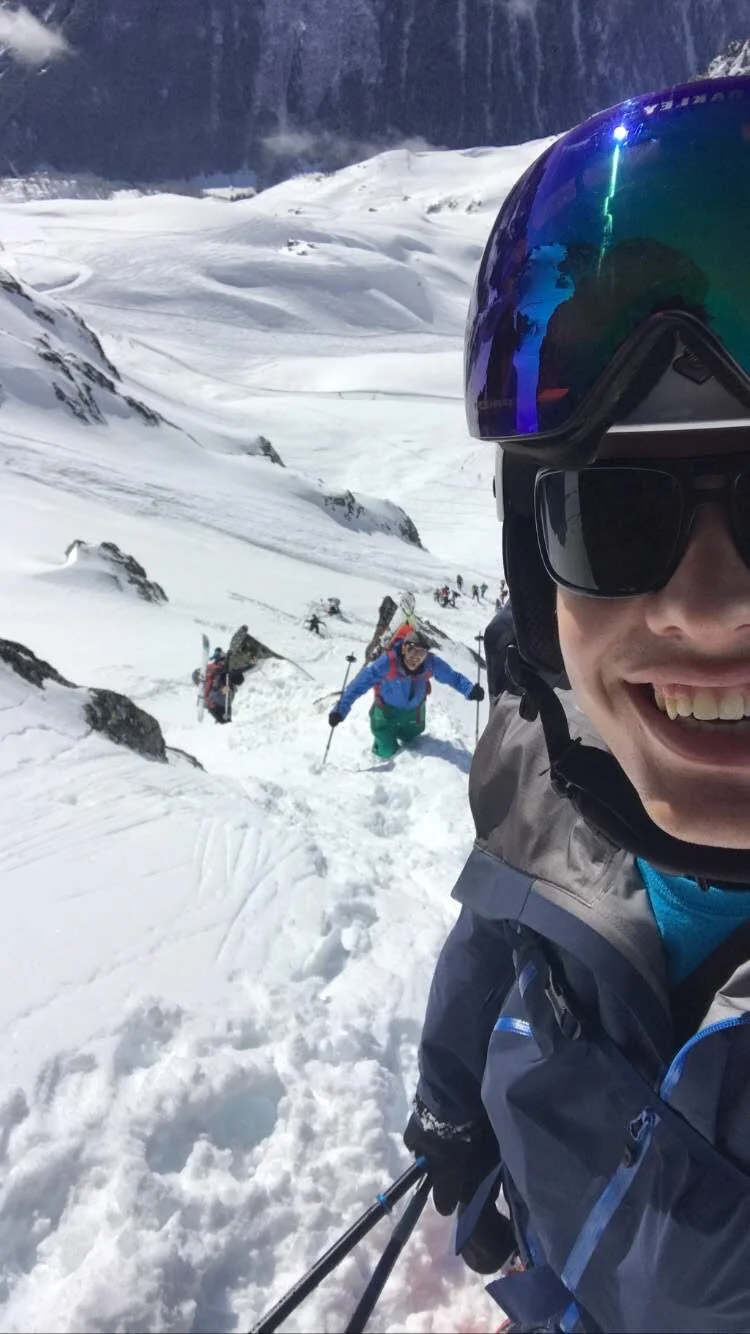
I was fortunate enough to go to Chamonix and see some of the pitches those guys skied and it was phenomenal to see.
“Use code ‘BLOG20’ for 20% off the eBook below”
This next mention is something a bit different. But is definitely a favourite of mine.
Working with the youth Mogul teams in Australia opened my eyes to the world of mogul skiing. Working alongside world class coaches and athletes, has had a huge impact on my development as a coach and a skier.
Mogul skiing is a difficult sport and this movie shows it in all its glory.
Bumps: A mogul Skiing Documentary
A link to the full movie on Vimeo
This is a documentary on the sport of Mogul Skiing, produced by a Canadian Mogul skier called Zac Hoffman. The link above is the whole movie.
This film highlights, the sport of mogul skiing, and it gives a great insight to an extremely difficult sport, that many people are unaware of.
Using interviews with both mogul skiers and coaches, giving insights into what it is like to be a world class athlete, and compete at the highest level.
My favourite thing is about the movie is the way it captures the admiration the athletes and coaches have for each other and their competitors.
It also shows the athletes phenomenal displays of athleticism and flare. Captured beautifully in this film.
It is a great sport, and a great film. Definitely worth a watch.
Thank you for reading this blog of my favourite ski movies.
Feel free to share this blog with anyone who you think may be interested, using the sharing links below.
If you are shocked that a certain one isn’t in this list, then please let me know.
Thank you,
Steve
If you need any more information on anything written here or have any suggestions for more blogs that you would like to read. Please don’t hesitate to let me know below. Thank you.
How do you train by yourself?
How do you improve your skiing by yourself?
Do you train by yourself?
Is it possible to teach yourself?
Can I coach myself?
These are questions I get asked by clients, friends and family.
When it comes to improving my skiing, I am very fortunate that due to my job and where I live, there are great instructors and coaches all around me.
One of my favourite things is skiing with my wife, who is also a ski instructor, and working on our skiing.
However, due to work and scheduling, it is rare that this happens. Finding the time during the season to go out with each other and train is difficult. It happens, but not as regularly as we would like.
Therefore, the answer is yes, I do train by myself, and yes it is possible to improve just skiing by yourself. I used to train like this a lot, whilst training for my exams.
However, there is a caveat to that, there needs to be some things in place to help keep you on the path to success. I will talk about them below.
Clear Goal
A clear goal is essential when looking to implement change in technique or performance.
If I want to score a goal, it saves me a lot of time and effort to know where the goal posts are first.
When it comes to setting a goal, I have found it works best if I have a clear way to measure whether I have completed the goal.
Let me explain. Using external and internal cues to know whether the goal has been achieved, helps me understand what to do next.
Lets take the example of skiing parallel. With the goal of smoother linked round turns down the mountain.
External
An external cue would be that the track left behind by the skis is round in shape. Like an S.
Therefore seeing an S shape in the snow behind me, would mean success.
Internal
An internal cue would be that the feeling in my legs whilst skiing is consistent and smooth. Not spiking when moving from turn to turn.
Therefore a consistent feeling in the muscles in my legs would mean success.
“Use code ‘BLOG20’ for 20% off the eBook below”
Ski
Once you have a goal, it is time to get skiing.
Whether that is a drill, or simply a few turns, having a clear goal will enable me to get some feedback.
Feedback
Did I do it?
Did I achieve the goal, yes or no?
For me again I use my internal and external cues to find out.
Using the goal of making round smooth turns again.
Internally it felt jerky and rushed. To see whether this internal feedback matches the external cue I check the tracks behind me.
Yes, the turn shape was jagged and not round at all.
Solid feedback that I did not achieve the task. This means there is room to progress.
progress
This is the area that takes more time when skiing by yourself. As it requires a bit of trial and error.
This is where I’ll pick a drill or skill that I think will help, and try it out. I’ll try counting,
I will count from 1 to 5, and try to match the movements in my legs to the counting.
Trying a few turns again, the internal feeling felt smoother in my legs, and to support that I check the external cue of the tracks on the snow.
Yes, they have created a rounder shape compared to not counting. The shape is more like an S
This means I was more successful at the task whilst counting, compared to no counting.
This is an improvement for me, and I will continue to practise. Whilst checking with my internal and external cues to see whether I am still achieving the goal.
This is how skiing by yourself can work. Trial and error.
This is why it is important that I know what the goal is, so that I can measure how successful I am when making changes to my technique.
Moving On
If you achieved success in the drill move onto another one, get a new goal and get shooting. This cycle repeats and repeats.
If you were unsuccessful, alter and try again. An analogy I like for this is a golf driving range. If you go to a driving range with the goal of hitting the ball straight.
Every time to hit the ball, you’ll get immediate feedback, and can alter slightly and try again, eventually getting the correct feeling for you of what it is like when the ball flies straight off the club.
However, imagine playing at night. Hitting ball after ball into the dark, not knowing whether you were successful, and whether any change in technique helped at all. Taking a lot longer to achieve the goal, if ever getting there.
This is why I keep a clear goal, and use simple external and internal cues to measure whether I was successful or not. This way through trial and error, making slight adjustments to technique I can successfully achieve my goal.

This is a very simple look at what goes into training by yourself. This is definitely not the only way, and it does not work for everyone the same.
However, I hope this information can help you to improve your own skiing. Feel free to share this with anyone you think may be interested in reading it using the links below.
Thank you for reading.
Steve
If you need any more information on anything written here or have any suggestions for more blogs that you would like to read. Please don’t hesitate to let me know below. Thank you.